Coin Designer · 6 minute guide
Coin Designer: 2D & 3D Minting
Design custom 1.5"-3" metal blanks with circular text banners. Mint in flat 2D vector engraving or 3D bas-relief height maps.
By Scott Bedow, Founder & Lead Developer · Published July 4, 2026 · Updated July 31, 2026
Manufacturing manager who runs CO2, diode and MOPA fiber lasers; builds and maintains every Reticle Red tool.
Method — Walked end to end in the live tool before publishing. Screens and step order match the current build; settings shown are starting points to validate on scrap.
What this tutorial covers
- Build custom coin blanks with circular text banners at any size.
- Choose flat 2D vector minting or a full 3D bas-relief height map.
- Export settings for fiber, MOPA, and CO2 coin production.
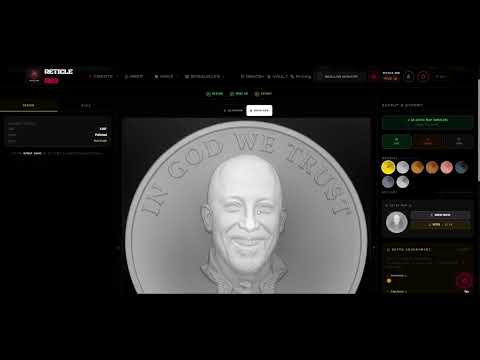
1. Choose a 2D or relief workflow
Select the output type that matches the job: 2D artwork for a flat graphic workflow or a depth map for a relief workflow. Set the coin size and decide which elements belong on each face.
2. Enter the wording and design brief
Write the subject description and add the intended text. Check spelling, text placement and the amount of detail at the finished coin size before requesting generation.
3. Choose the style and review the price
Pick the available style and engine for the selected workflow. Review the displayed credit charge, generate once, and inspect the delivered design for lettering and subject completeness.
4. Calibrate and export
For relief, inspect the 3D preview and depth range before downloading the production depth file. For 2D, choose the available artwork export. Verify scale and the receiving machine workflow before testing on matching material.
Validate the workflow on your machine
Treat the finished file as a controlled starting point, not a universal machine recipe. Confirm the artwork dimensions after import, verify focus and lens selection, and run a small test on scrap from the same material batch before committing the production piece. Change one variable at a time when tuning speed, power, frequency, line interval, or pass count. Record the machine, source wattage, lens, material finish, focus method, and final settings with the saved job. That short production note makes the result repeatable for the next operator and prevents a strong screen preview from being mistaken for a proven burn.